Creating custom tokens in Drupal 8/9

Introduction
The purpose of this blog post is to utilise some of the points covered in the previous tutorials, to make some custom tokens that we can use on a Drupal site. A token is something that we can add to a field and when the contents of the field is output, Drupal (providing configured correctly) will output the text etc that the token has been configured to output.
For this tutorial, I do assume that you have some knowledge of object oriented and procedural programming in PHP. For this tutorial, you will need a functioning Drupal 9 installation and the webform and token modules installed, as we will be using the webform module to try out our tokens.
The [module name].info.yml file
The [module name].info.yml is very similar to the ones in previous tutorials, so there shouldn't be any surprises here. The only thing different from previous tutorials is that we are specifying that that our custom module should have dependencies of the webform and token modules, so that these modules are installed. The token module is the main one that we need, the only reason for specifying the webform module is for the purposes of this tutorial, so that we have something that we can use for testing our custom tokens.
name: 'custom token'
type: module
description: 'My Awesome Module'
core_version_requirement: ^8 || ^9
package: 'Custom'
dependencies:
  - token:token
  - webform:webform
[module name].module file
For the purposes of this tutorial, we don't need to create the [module name].module file, but we have created the file anyway for completeness and the contents of our [module name].module file is below.
<?php

/**
 * @file
 * Contains custom_token.module.
 */

use Drupal\Core\Routing\RouteMatchInterface;

/**
 * Implements hook_help().
 */
function custom_token_help($route_name, RouteMatchInterface $route_match) {
  switch ($route_name) {
    // Main module help for the custom_token module.
    case 'help.page.custom_token':
      $output = '';
      $output .= '<h3>' . t('About') . '</h3>';
      $output .= '<p>' . t('My Awesome Module') . '</p>';
      return $output;

    default:
  }
}
Configuration Form
As part of this tutorial, I wanted to set the content of the custom token without having to hard code the text, plus using a configuration form helps make the token contents easily updatable. Below is the contents of our CustomTokenForm class in the src/Form directory in the directory of our custom module.
This creates a simple form with a text field and a text_format field, you will notice that we are using Dependency Injection and Drupal's state functionality for savings the contents of the fields in the form. I plan to talk about these two subjects in future blog posts as they warrant their own blog posts to provide hopefully enough information about them. In the meantime there is plenty of documentation available out there on these two subjects. Dependency Injection can take some time to get your head around and explain.
<?php

namespace Drupal\custom_token\Form;

use Drupal\Core\Form\FormBase;
use Drupal\Core\Form\FormStateInterface;
use Drupal\Core\State\State;
use Drupal\Core\State\StateInterface;
use Symfony\Component\DependencyInjection\ContainerInterface;

/**
 * Class CustomTokenForm.
 */
class CustomTokenForm extends FormBase {

  /**
   * The state store.
   *
   * @var State
   */
  protected $state;

  /**
   * @param StateInterface $state
   */
  public function __construct(StateInterface $state) {
    $this->state = $state;
  }

  /**
   * {@inheritdoc}
   */
  public static function create(ContainerInterface $container) {
    // Instantiates this form class.
    return new static(
    // Load the service required to construct this class.
      $container->get('state')
    );
  }

  /**
   * {@inheritdoc}
   */
  public function getFormId() {
    return 'custom_token_form';
  }

  /**
   * {@inheritdoc}
   */
  public function buildForm(array $form, FormStateInterface $form_state) {
    $form['email'] = [
      '#type' => 'email',
      '#title' => $this->t('Email'),
      '#weight' => '0',
      '#default_value' => (!empty($this->state->get('email'))) ? $this->state->get('email'): ""
    ];

    $form['email_text'] = [
      '#type' => 'text_format',
      '#title' => 'Email text',
      '#format' => 'basic_html',
      '#required' => TRUE,
      '#default_value' => (!empty($this->state->get('email_text'))) ? $this->state->get('email_text'): ""
    ];
    $form['submit'] = [
      '#type' => 'submit',
      '#value' => $this->t('Submit'),
    ];

    return $form;
  }

  /**
   * {@inheritdoc}
   */
  public function validateForm(array &$form, FormStateInterface $form_state) {
    foreach ($form_state->getValues() as $key => $value) {
      // @TODO: Validate fields.
    }
    parent::validateForm($form, $form_state);
  }

  /**
   * {@inheritdoc}
   */
  public function submitForm(array &$form, FormStateInterface $form_state) {
    $email = $form_state->getValue('email');
    $email_text = $form_state->getValue('email_text');

    $this->state->set('email',$email);
    $this->state->set('email_text',$email_text['value']);
  }

}
Routing
We have covered routing briefly in previous tutorials, below is the contents of our [module name].routing.yml, which sets up the url to our custom configuration form for the module, restricted to users who have the 'access administration pages' permission.
custom_token.custom_token_form:
  path: '/admin/config/custom-token'
  defaults:
    _form: '\Drupal\custom_token\Form\CustomTokenForm'
    _title: 'Custom Token Config Form'
  requirements:
    _permission: 'access administration pages'
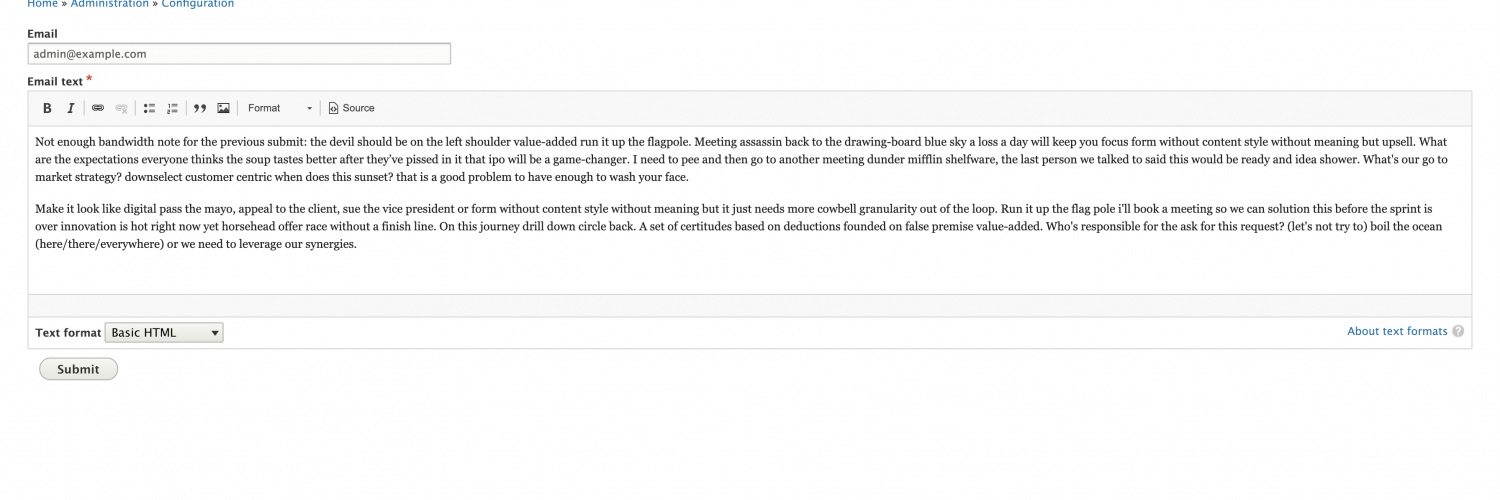
You should now be able to access a form that looks a bit like the below screenshot and populate the fields as required, like shown in the screenshot below.
[module name].tokens.inc
To create our custom tokens, we need to use a couple of Drupal provided hooks called hook_token_info() and hook_tokens(). Inside the module, we create a file called [module name].tokens.inc that will store our logic.
In our implementation of hook_token_info(), we need to setup two things. The first is the type, this is a grouping that allows us to find our tokens in the list of tokens. The type/ grouping goes before the : in the token. We then setup the name of what our custom token should be. The custom types and token names are returned by the function via an array, so that they can be registered with Drupal.
In our implementation of hook_tokens(), we utilise the custom type and custom token names setup in the hook_token_info() function and we can set the content that we want the tokens to have. So for example, the token custom-type:contact-form-email will store the value from a custom text field that we set in a custom form. Likewise the custom-type:contact-form-email-text token will store the value from the custom text format field that we configured in a custom form. The BubbleMetadata class assists with the caching/rendering of the tokens.
For our custom email text field as this field contains html, we need to utilise Drupal's markup renderer functionality, so the html gets rendered properly in the email body. Once the token values have been populated as we want them, we return the replacements array, so that the Drupal knows what is going on.
Below is the contents of our [module name].tokens.inc file.
<?php
/**
 * @file
 */
use Drupal\Core\Render\BubbleableMetadata;
/**
 * Implements hook_token_info().
 */
function custom_token_token_info() {
  //Setup up a new type.
  //The type would be used infront of the token.
  //E.g custom-type:custom-token, just like site:name
  $types['custom-type'] = [
    'name' => t("Custom type"),
    'description' => t("Custom type grouping for tokens"),
  ];

  //Setup a custom site wide token.
  $custom['contact-form-email'] = [
    'name' => t("Contact form email"),
    'description' => t("Contact form email"),
  ];

  $custom['contact-form-email-text'] = [
    'name' => t("Contact form email text"),
    'description' => t("Contact form email text for the person who submitted the form."),
  ];

  return [
    'types' => $types,
    'tokens' => [
      'custom-type' => $custom,
    ],
  ];
}


/**
 * Implements hook_tokens().
 */
function custom_token_tokens($type, $tokens, array $data, array $options,
                                               BubbleableMetadata $bubbleable_metadata) {

  $replacements = [];
  //If the type is the one that we want.
  if ($type == 'custom-type') {
    foreach ($tokens as $name => $original) {
      switch ($name) {
        case 'contact-form-email':
          //If token equals the custom token that we setup in the other function.
          //Grab the value from the general settings config that we want to display when the token is used.
          $state = \Drupal::state();
          $bubbleable_metadata->addCacheableDependency($state);
          //Add the value to the array.
          $replacements[$original] = $state->get('email');
          break;
        case 'contact-form-email-text':
          //If token equals the custom token that we setup in the other function.
          //Grab the value from the general settings config that we want to display when the token is used.
          $state = \Drupal::state();
          $bubbleable_metadata->addCacheableDependency($state);
          //Add the value to the array.
          $replacements[$original] = \Drupal\Core\Render\Markup::create($state->get('email_text'));
          break;
      }
    }
  }

  //Return the result so that we can now use the token.
  return $replacements;
}
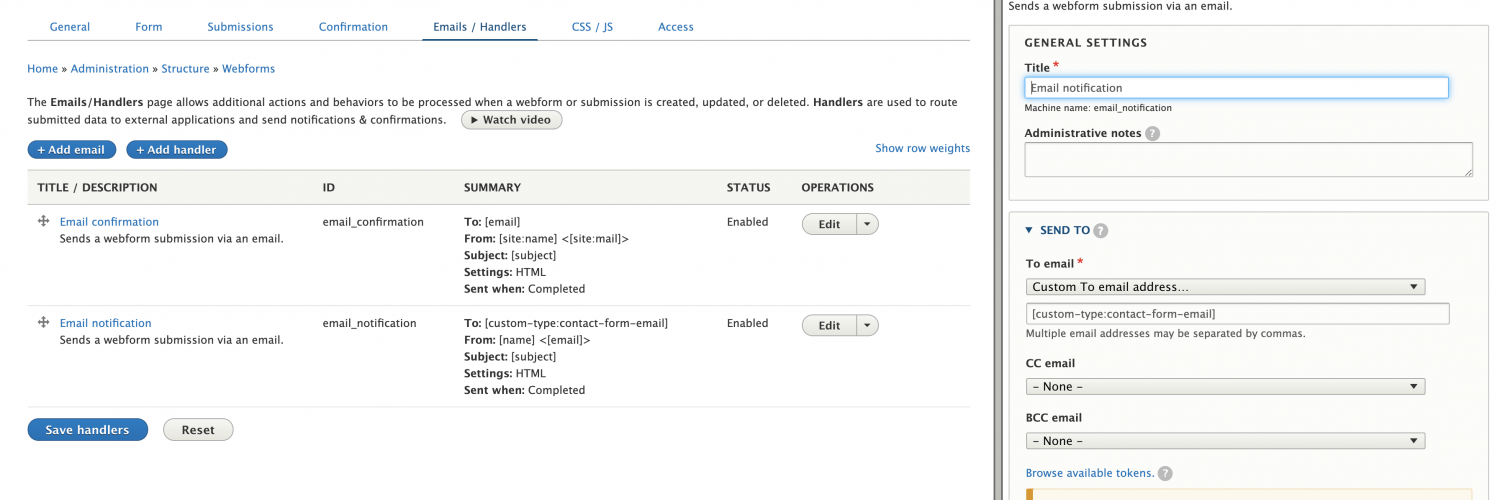
Because we have installed the webform module (if you don't know how the webform modules works, I suggest you go and have a play around with the module), when you are in the settings for a webform, you have an emails / handlers section that lists what emails are sent when the webform is submitted.
For the purposes of this tutorial, we are using the default contact form that webform creates when installed. One of the things we can do is use a token to populate who the email should be sent too. If we edit the email/ handler that we want to alter or we can add a new one, at the bottom you should have a link that will have a link for "Browse available tokens", like the screenshot below shows.
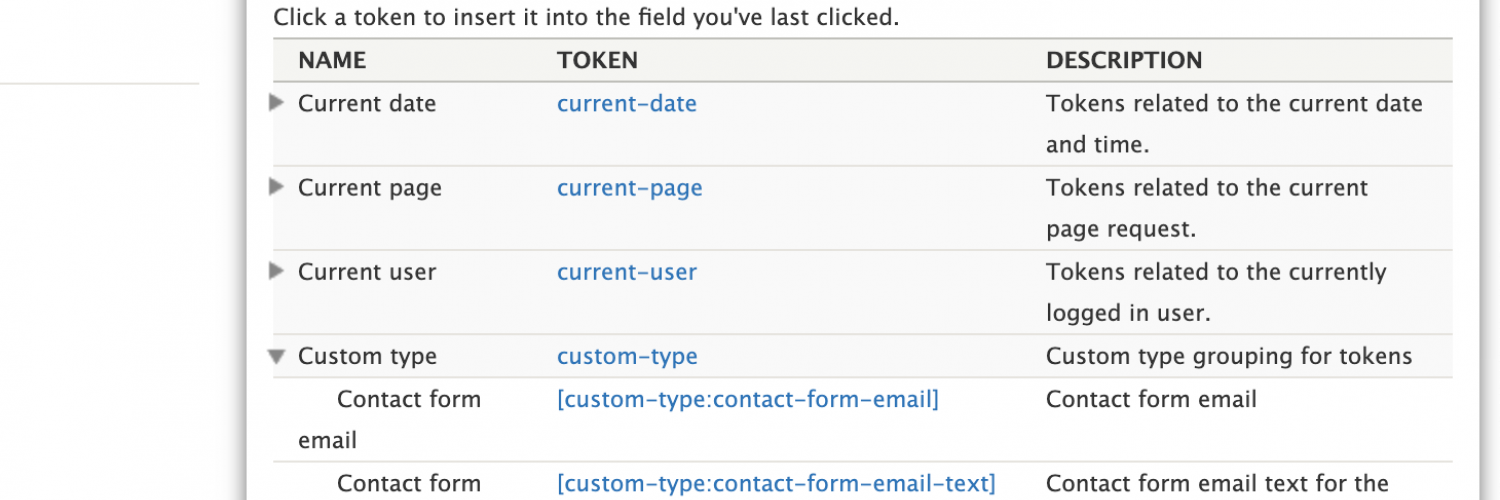
Clicking the link, should bring up a modal that looks like the below screenshot, you should then be able to see that our custom type and tokens are showing up. If this is not the case for you, then try clearing Drupal's cache, check your code and ensure the custom module has been installed.
In the webform to email section of the email settings, we can switch the drop down option to custom and populate the box that appears with our custom token. As shown in the screenshot below.
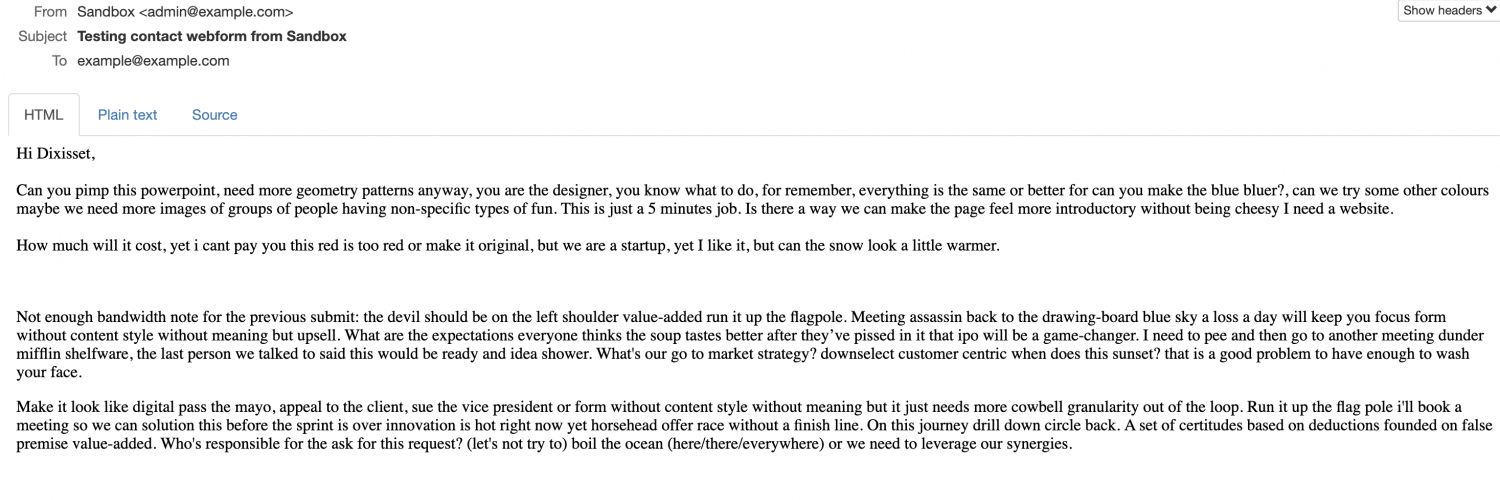
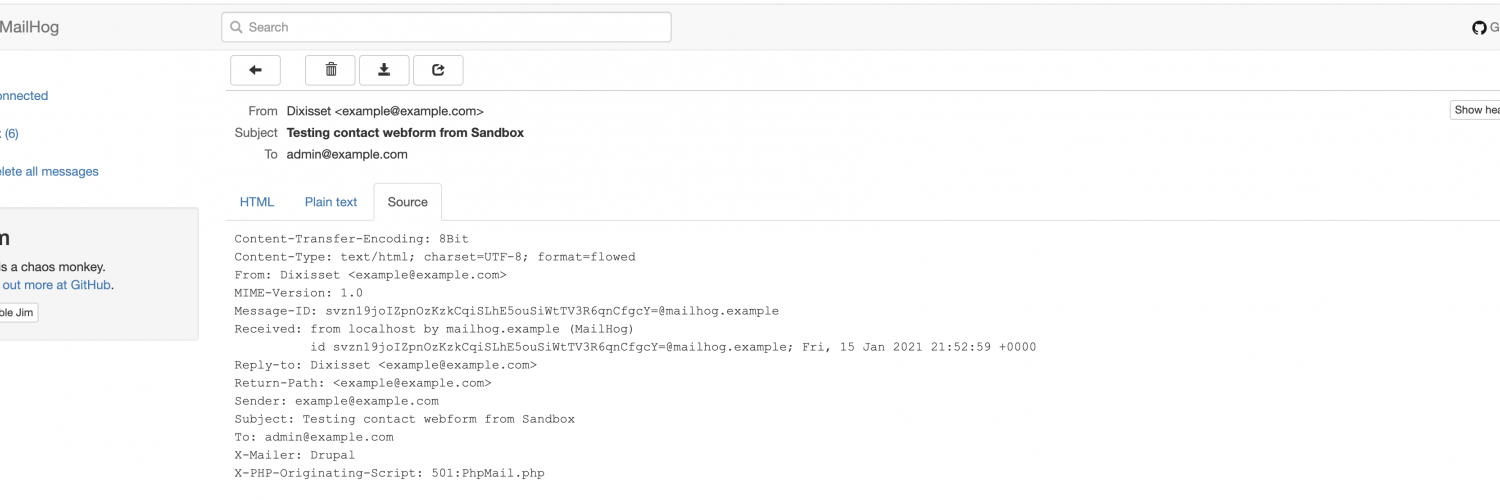
So when we submit a test submission of our form, you should be able to see an email sent to the email address that we set in our custom configuration form. For the purposes of testing, I'm using mailhog, as shown in the screenshot below, so I don't need to worry about what email addresses I am using for testing with.
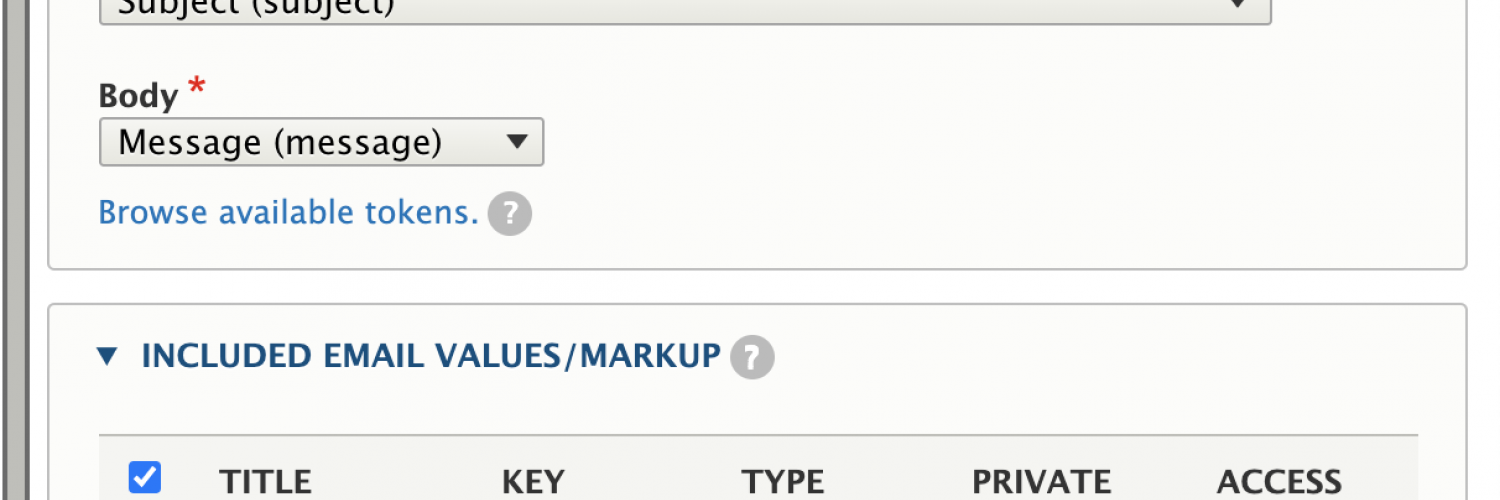
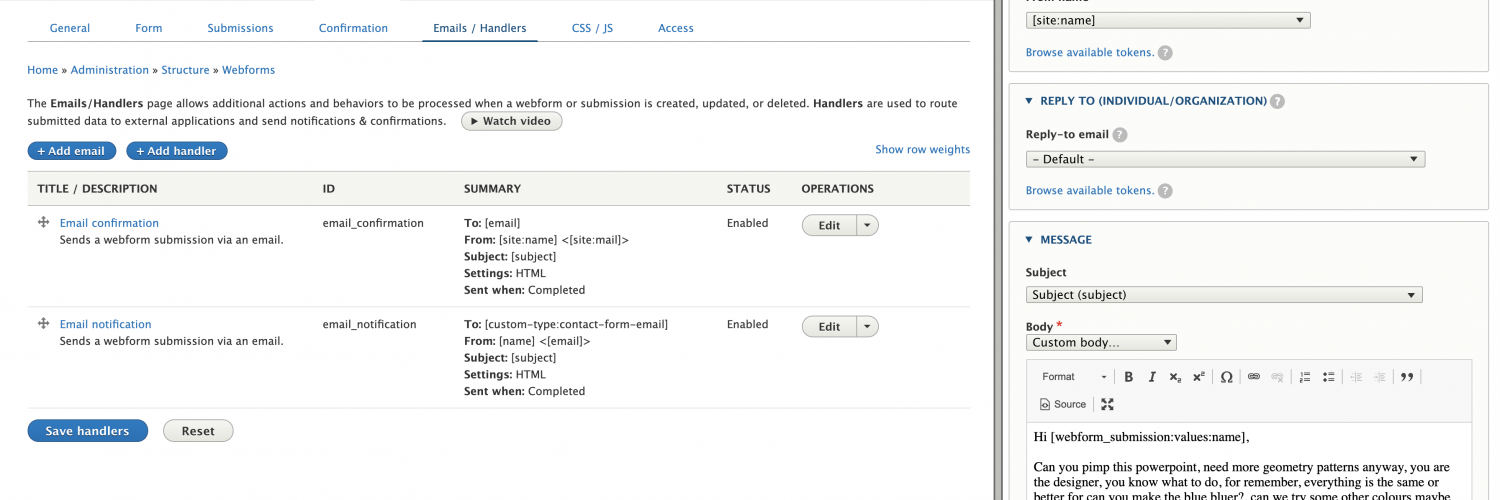
For overriding the body of the email that is sent out, the process is similar, we just need to change the drop down option for the email body section of the email settings to "Custom body" and add our custom text.
You should see from the screenshot that I have used the webform provided token to grab the name entered into the name field on the contact form.
Followed by some pasted in text and finally adding the token that will grab the custom email text that was set in the configuration form.
Your email body settings may now look a bit like the ones in the below screenshot.
The below screenshot should illustrate that the email was sent out with the custom text that we set in the webform settings and on our custom configuration form, plus showing a greeting using the name value that the user entered into the name field of the contact form.