Building a Drupal 8/9 custom block

Intro
The purpose of this blog post is to utilise some of the points covered in the last tutorial, to make a module that provides a custom block that we can place in a region using the Drupal block admin interface and also specify some custom text in the custom blocks settings and display that custom text using a custom template file.
For this tutorial, I do assume that you have some knowledge of object oriented and procedural programming in PHP.
Info file
The [module name].info.yml file that we will be using is shown below, this is very much like the one mentioned in the last tutorial, so nothing new to mention here.
name: 'Custom block'
type: module
description: 'My Awesome Module'
package: 'Custom'
core_version_requirement: ^8 || ^9
.module file
The [module name].module file that we will be using is shown below, this is very much like the one created in the last tutorial, so nothing new to mention here.
<?php

/**
 * @file
 * Contains custom_block.module.
 */

use Drupal\Core\Routing\RouteMatchInterface;

/**
 * Implements hook_help().
 */
function custom_block_help($route_name, RouteMatchInterface $route_match) {
  switch ($route_name) {
    // Main module help for the custom_block module.
    case 'help.page.custom_block':
      $output = '';
      $output .= '<h3>' . t('About') . '</h3>';
      $output .= '<p>' . t('My Awesome Module') . '</p>';
      return $output;

    default:
  }
}

/**
 * Implements hook_theme().
 */
function custom_block_theme() {
  $theme['custom_block'] = [
    'variables' => [
      'custom_text' => NULL,
    ],
    'template' => 'custom-block',
  ];

  return $theme;
}
Block class
First of all we need to ensure we have the folder structure setup, inside your custom module, create a file src/Plugin/Block/CustoBlock.php.
The basic skeleton of the class is below, we are extending Drupals BlockBase class, the key thing for this class to create our custom block is the annotation above the class, this tells Drupal that we are creating a block plugin, this is to enable the custom block to show up in the block interface in the Drupal admin. So in this annotation, we give our custom block a friendly name and a machine name.
<?php

namespace Drupal\custom_block\Plugin\Block;

use Drupal\Core\Block\BlockBase;
use Drupal\Core\Form\FormStateInterface;

/**
 * Provides a 'CustomBlock' block.
 *
 * @Block(
 *  id = "custom_block",
 *  admin_label = @Translation("Custom block"),
 * )
 */
class CustomBlock extends BlockBase {


}
Next we add a function that stores some default configuration for the block. For the purposes of this tutorial, we are not going to do anything too advanced, so we will just be using the code shown below.
/**
 * {@inheritdoc}
 */
public function defaultConfiguration() {
  return [
  ] + parent::defaultConfiguration();
}
The next bit is optional, as you can add a form field(s) that show up with configuring the block in the block admin interface, allowing you to configure settings that are specific to the block or specific to each particular instance of the block added to the site, so that we don't have to have a bunch of static blocks that have the same functionality but just different content, we can create one block and output the content from the form fields set on the block form.
For this form, we are just using fields from Drupal's form API, for example we have added using the code below a text field. If you don't know much about the form API then I suggest reading the documentation on Drupal.org.
/**
   * {@inheritdoc}
   */
  public function blockForm($form, FormStateInterface $form_state) {
    $form['text'] = [
      '#type' => 'textfield',
      '#title' => $this->t('Custom text'),
      '#description' => $this->t('Custom text'),
      '#default_value' => $this->configuration['text'],
      '#maxlength' => 64,
      '#size' => 64,
      '#weight' => '0',
    ];

    return $form;
  }
The next function to add is the blockSubmit function, this allows us to save the values from the fields from the blockForm, the code used to save the values from the text field that we added above is below. The form value is saved into the block configuration for this particular instance of the block and is not handled using Drupal 8's configuration management functionality.
We can also if needed a blockValidate function that can be used to validate the data that is entered into the form.
/**
 * {@inheritdoc}
 */
public function blockSubmit($form, FormStateInterface $form_state) {
  $this->configuration['text'] = $form_state->getValue('text');
}
Finally, we add a function called build, this contains our render array, just like in the last tutorial, we are rendering our custom block, so we specify our theme name and add key that will be registered as a custom variable that stores the value from the custom form field that we stored in the block configuration linked to the instance of the block.
/**
* {@inheritdoc}
*/
public function build() {
return [
'#theme' => 'custom_block',
'#custom_text' => $this->configuration['text'],
];
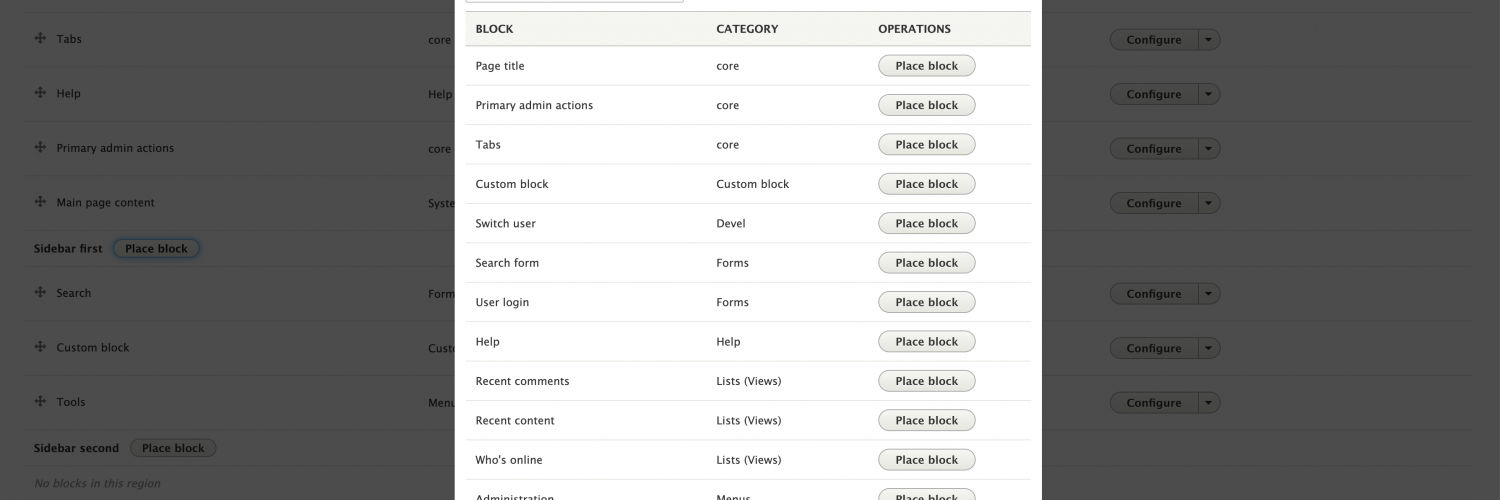
}You should now be able to go to Drupal's block admin (I would clear Drupal's caches to be sure), you can then click the place block button on the page and your custom block should be showing, just like my custom block is showing, just look for the name that you set in the annotation in your block class and click the 'Place Block' button.
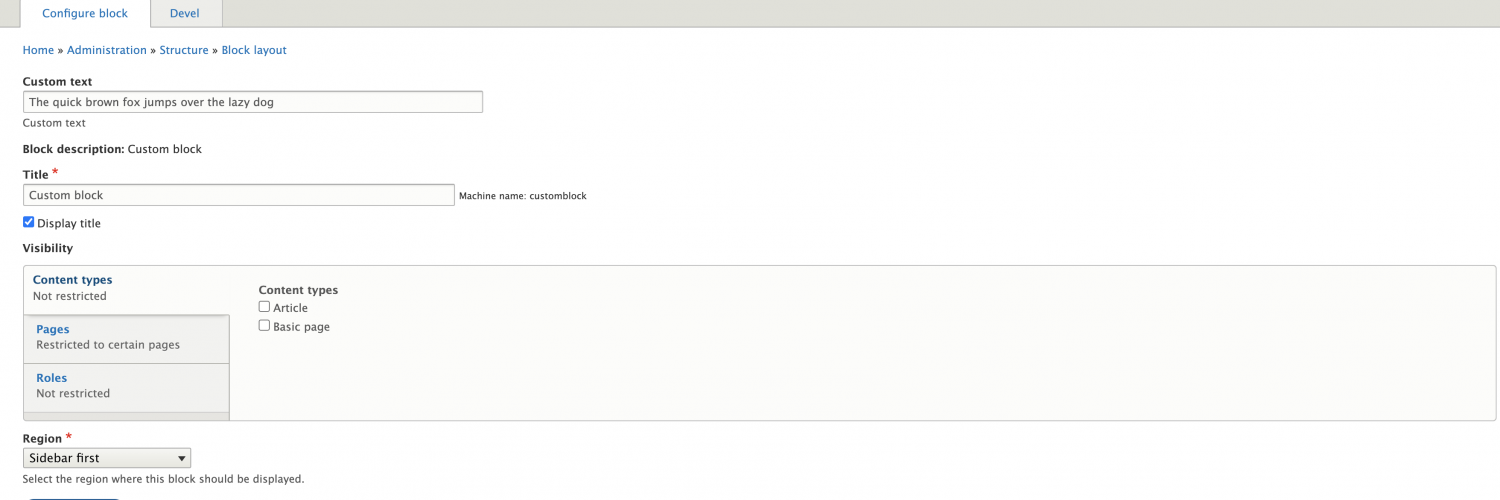
You should then see a modal dialog that shows the custom field showing on the custom block configuration form along with the generic block configuration fields (as shown in the screenshot below, you can alter the position of the custom field, just add a weight value to the form field.
Once you have configured any other relevant block configuration including assigning the block to a region, you can click the 'Save Block' button and this will add the block to the region that you have selected.
Template
Now that we have the block added to the region, we need to output the text from our custom field with the markup that we want.
The custom template file registered in the hook_theme function in the .module file (custom-block.html.twig) should be created inside a templates folder in the module, or equally it can go into your custom theme if you prefer.
The template will allow you to insert your own markup and it helps keep your code much cleaner. In the twig file you can then output the value of the custom variable that we registered in the theme hook too.
<!-- Add you custom twig html here -->
{{ custom_text }}
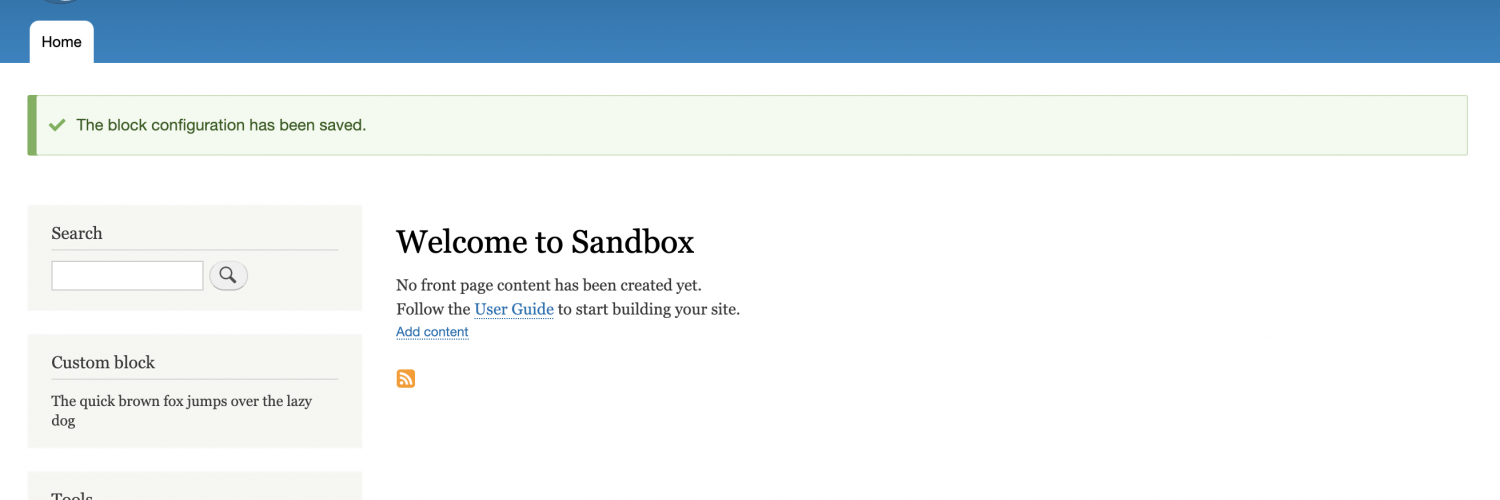
You should now have a block showing just like the block shown in the screenshot below.
Conclusion
This module creates a simple block that outputs the contents of a custom field that can be populated for each instance of the block added to a region. We can extend the functionality further to grab values from Drupal's state or config stores or query for content etc, utilising custom services and dependency injection, the opportunities are endless really, but I'll leave that for another blog post.